

{Crew and his best bro, Bucket. Seriously, these two melt me}
 {Crew and Lu Camera leggings}
If you have been following me, I have been hinting that my brand has some projects in the works. And this my friends, is a sneak peak… Crew & Lu will be revamping it’s website very soon and included will be an ONLINE SHOP! Seriously, I am so excited I can’t even stand it. Pretty soon you can outfit your little gem with hip urban styles from Crew & Lu. We will be offering baby leggings in an assortment of prints that will have your little boys movin and your little girlies shaken! So keep tuned in, I’ll update on progress of the shop as much as I can.
My friends sweet baby rockin the Aztec print. Isn’t lil’ Eddie so handsome? In love with him.

In my post here, I wrote about revamping my blog and finding a web designer. There are so many fabulous ones out there, that it was so hard to narrow it down. I wanted a designer that could collaborate with me and bring all my visions to life. And so… I am thrilled to be working with Red Met Yellow Creative. I was so proud of myself in the fact that I didn’t make an impulsive decision. Normally I would have but with Crew & Lu I feel as though I’ve been nurturing this process. I took a lot of time, asking myself what I wanted from a design team. If they could achieve the look I envisioned, and honestly if they are cohesive with my brand. I think it is so important to choose a designer that has your same esthetic. Red Met Yellow definitely fit that mold. Not only that, Megan took the time to speak with me to answer any questions I had and put all my fears to rest. And so another part of the journey has begun. I am exploding with nervousness, excitement, and I am learning patience. Can’t wait for you all to see what has to come.
Creative kisses to you.


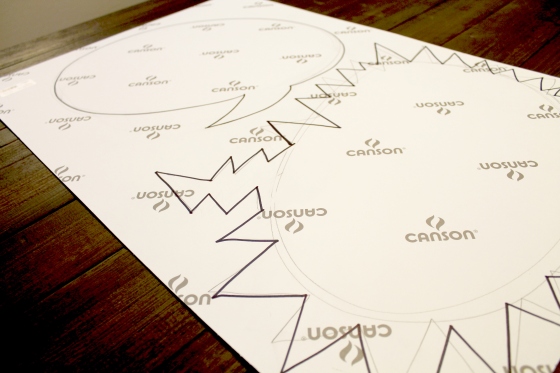 The first couple of steps are simple! Sketch the shape you want your comic bubble to look like on the back of the cardboard poster. I wanted my bubbles to be a little bit bigger so I was able to fit two on mine. I think it would be cute to make slightly smaller ones for kids and honestly there are so many shapes you could do! Then cut them out with scissors.
 After my shapes were cut out, I rolled chalkboard paint with a small sponge roller (to get a more even finish). I painted three coats, giving dry time between the coats. I’m sure two coats would do but I wanted to make sure the whole surface was even and durable.
 This is my dog Bucket! My hubs and I always narrate what’s going on in his head.
 I’m pretty positive this is on his mind daily! Hee-hee
 Happy diy!
 First of all, I should start off with a disclaimer….we are NOT professionals! Ha! My husband and I always sit around and think up big ideas…and I mean BIG! One evening, we thought of a master plan for our master bath and of course while thinking- we’re rubbing our hands together thinking we are GENIUSES (had to give you a visual). This is the biggest project either of us has ever taken on and actually we were both renovation virgins. I honestly think we would have been perfect for that show “Renovation Realities”. Hey, ya gotta start somewhere right? I scoured through pinterest, magazines, internet, and even had help with an interior designer at one point to help me figure out what direction I wanted the master bath to go in. Well, I’m not gonna lie this renovation was a lot bigger than we thought and well…it’s taken us awhile. But I’m staying positive and always refer to the fact that once it’s finished, it will be mind blowing AMAZING. Until then…we are still working away!
 {handy hubby and I…I think I was about 8 months pregnant here}
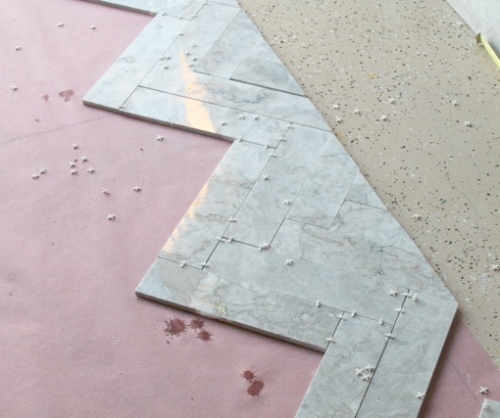 My hubby really wanted the steam shower so I let him run with that. Everything else, he left to me. He has been amazing helping my vision come to life and has been so easy going with the choices I’ve made. And lucky for me, he’s loved everything I’ve thrown at him. I have to say we’ve collaborated really well so far. I love the look of marble, I think it comes across so classy and clean. I picked out tile that had grey undertones rather than brown and he painstakeingly hand cut every tile to make this herringbone pattern I’m absolutely obsessed with! We had some help with the tiling as we were at crunch time (baby boy was going to make his appearance any day). We at least wanted the shower portion of the renovation done. I was actually running out to pick up more tile, when I went into labor! But that’s another story in itself.
 So while I was in labor and experienced the best day of my life…the shower took shape. Can you see the gloriousness…My hubs was with me at the hospital but got to check in quick at home to see the progress.
 After we got home and settled with the baby…we got to work on the shower. And the shower portion finally got done! Whoopee!
 We installed a rain shower head (Kohler- similar one
 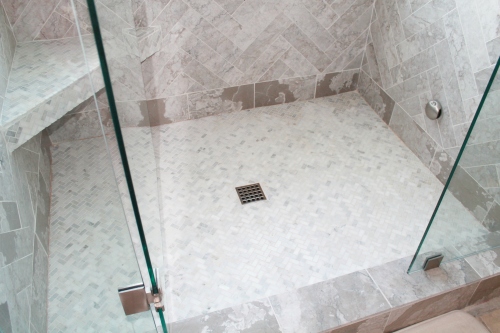 I wanted to keep the herringbone pattern on the bottom of the shower…I didn’t want too much going on but I thought this smaller tile complimented the shower as a whole perfectly.
 And part one…DONE! Hope you like our shower- we are in love with it! Now on to part two. Remember where the old shower was…that teeny tiny space? That my friends, is going to become my vanity. Part two coming soon!
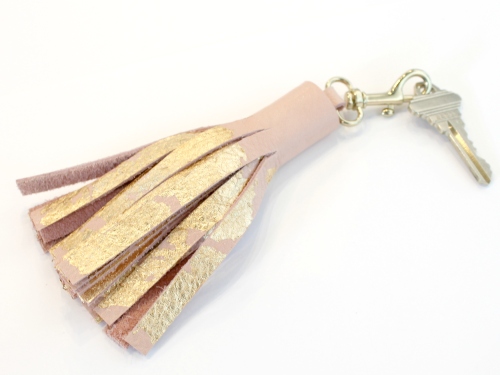 Blush and gold is one of my favorite color schemes. Pair these two together and you can’t go wrong. I keep seeing the cutest key chains at coach, kate spade, and other fine stores but I felt I could tackle this project myself. I used this
  I started out by cutting my strip of leather (or faux leather) to 10 inches x 4 1/2 inches. I then wanted to spruce it up by modge podging gold leaf to it. I added gold leaf all the way across the leather leaving about an inch at the top without gold leaf. I intentionally scattered the gold leaf imperfectly. I liked that it had an organic feel to it!
 After I let the gold leaf dry (about an hour), I brushed a very light coat of modge podge on top of the gold leaf to set it. I also made sure I lightly removed any excess gold leaf.
 I sliced each section with about 1/4 of an inch space between each cut and left roughly an inch on top uncut.
 I then used super glue to adhere the clip attached to the strip of leather and started to roll the fringe leather around that piece. As you can see I opted for a clip rather than a key ring. I felt like it would be more versatile.
 And voila! Isn’t it pretty! Obsessed.
 Gold and glitter = LOVE! Does anybody love sparkles as much as I do? This is super easy and dresses up any paperwork into a beauty. If you have to look at piles of paper for work, why not make it pretty! These glitter clothespin clips are perfect for a craft party I’m planning and will be lovely accompanying the invitations.
 With your brush paint a layer of Modge Podge onto the clothespins. While it’s wet, sprinkle the glitter generously over the clothespins. Let dry for about 30 min to an hour.
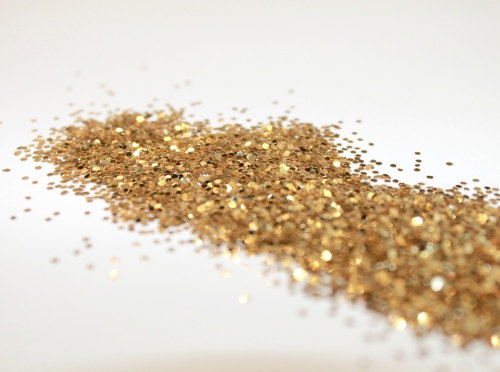 Carefully tap each clothespin to remove the excess glitter.
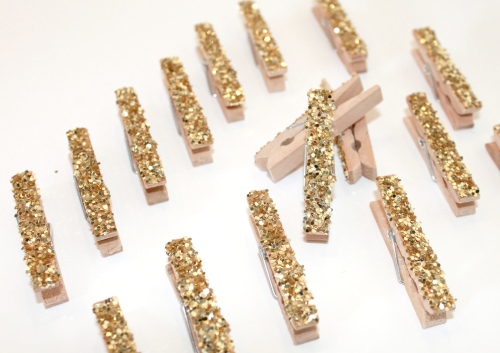 Paint one more layer on top of the clothespins and glitter to set the glitter into place.
 And voila! Glitter goodness for any occasion.


